
DIY Dog Catching Treat Photos
Have you been inspired by the Dogs Catching Treats photo series and want to capture your own?
Well, I did. I was stuck around home for a while and decided to make this one of my special projects to keep me busy.
I thought this might be a fun thing for other people to do so I decided to share some of my advice and tips for how to take a photo of your dog catching a treat.
First Step: Choose the Right Treat
Choose an irresistible dog treat
The tastier the treat is, the more your dog will be compelled to catch it (or at least try).
Choose a treat that is small but not too small
Because you will be practicing with about 10-20 treats per session, up to 3 times a day, you’ll want to select small treats to keep the calorie count down.
Pro tip: subtract the calories of treats or food you use from your dog’s daily meal(s). This means that they will be eating a bit less but doing this will help keep your dog at a healthy weight.
However, the treat needs to be big enough for your dog to see while they’re moving across a “busy” background.
I found anything smaller than a pea was too small.
Use a dog treat that is light to medium weight
I found that the treats don’t “fly” or get enough loft if they are too light.
However, I found I was more accurate at tossing – the trajectory of the treat was more predictable – if it had a bit of weight to it.
But if it’s too heavy, it might not fly far or high enough.
Use a treat that is a good balance of both.
Second Step: Train Your Dog to Catch Treats
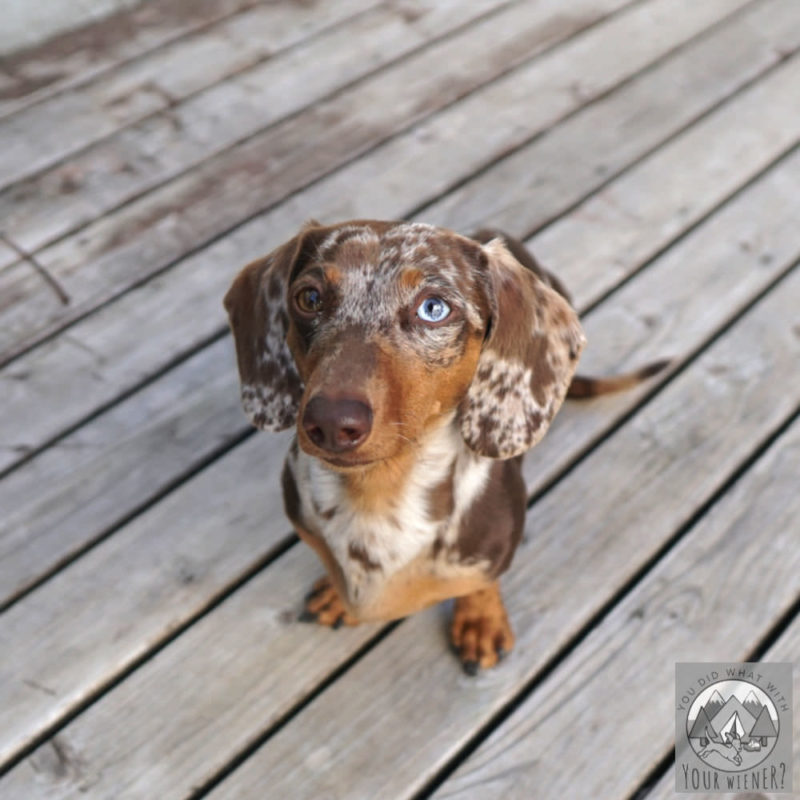
In my case, my Dachshund was already “trained” to catch dog treats I toss mid-air before I started this little photo adventure.
When I say trained, I didn’t exactly teach her to do it.
I was tossing treats on the floor one day (for my dogs to “hunt”) and she caught one before it landed. I just reinforced that behavior by practicing with her.
So, in full disclosure, if your dog doesn’t know how to catch treats or toys in the air already, I am not going to be able to offer you expert advice.
However, I can offer some guidance and tips.
Since I can’t demonstrate the best way to teach a dog to catch treats, I did some online research hoping to find some good instructions for you.
These are the best resources that Iv’e found so far:
Article: How to Train Your Dog to Catch Food
I liked this article about teaching a dog to catch because it outlines 3 different methods you can try to get your dog to catch a piece of food or treat you toss.
Not all methods will work for all dogs. Some dogs are naturally inclined to catch things so they will pick it up quicker.
I think method #1 in this article makes the most sense for a dog that has no idea how to catch a treat yet.
Article: How to Teach Your Dog to Catch
This article is about teaching your dog to catch a toy but it recommends starting to teach that process with treats.
What I really like about this one is that step #3 addresses the all-too-common problem: a dog that just stares at you, lets the treat fall on the floor, and then eats it.
This article offers a couple of potential solutions for that.
Video: Can Your Dog Catch Ball? Teach Them How!
Some people are visual learners so I wanted to share a video demonstration of how to teach this trick.
I looked through about 20 and thought this video was the best.
It’s ultimately about catching a ball but, as with the article above, the first step is teaching your dog to catch a treat.
I also like that the woman has a smaller dog.
Step Three: Capture Funny Photos of Your Dog Catching Treats
Once your dog is reliably catching treats – which could take a couple days or weeks to teach – the next challenge is trying to get it on camera.
You’ll want to decide whether you want to try video, your phone’s camera, or a DSLR camera.
Smartphone video
In my experience, the video is easiest.
If you start filming before you toss the treat, it will likely stay in focus the entire time.
Also, you can usually still toss the treat with your dominant hand while you operate the phone with the other (this will maintain your accuracy).
The main drawback here is that you will capture the trick but not be able to freeze your dog’s motion and expressions mid-air like you would with a camera.
Since it was those freeze-frames of derpy faces and funny motions I wanted to capture, this was not the method I chose.
If your pone has a slow motion video option though, that could be fun.
Smartphone photos
Some people only have their phone to take pictures with. While it’s not the best option, it can work.
Most phones made in the last couple of years have a “pro” mode on the camera while you can adjust the settings.
While you can just see what your camera captures in normal mode, you may need to manually adjust your phone cameras settings.
You can control the focus depth of field with aperture and freeze frames with shutter speed.
Some pro modes will only allow you to adjust one or the other while automatically selecting the other factor for you.
If you can only control one thing, increase the shutter speed as much as you can without making the image too dark.
If you can also control the aperture setting, increase the depth of field by increasing the f stop (the higher the number, the clearer things further away from the camera lens will be).
If your phone camera does not allow for manual adjustments, or the shutter speed won’t go up high enough, you’ll probably end up with a lot of blurry shots.
That doesn’t mean you can’t get a good one though.
You may have to hold your phone to take pictures in your dominant hand, which means you may have to throw the treat with your other hand, which can decrease accuracy, but having to switch hands is not always the case.
If your phone has the option to take multiple, successive photos quickly by holding down the shutter button, that can help increase the likelihood you will get a good one.
DSLR Camera
If you have access to a DSLR camera, I think this is the best way to go. It gives you the most control over how the picture turns out.
I’m going to start with the drawbacks right away with this one though.
A DSLR is heavier, you will have to hold it in your dominant hand in order to press the shutter, which likely means you have to throw the treat with your non-dominant hand.
Also, using a DSLR camera can be a frustrating experience for you if you don’t already understand the principles of photography and/or don’t know the settings on the camera you are going to use well.
Using a DSLR is likely to yield the most usable photos though.
You can adjust the shutter speed to freeze the action (higher shutter speed), you can adjust the aperture to help keep your dog in focus (higher number decreases the chance of blurry focus), and you can adjust the ISO (and exposure compensation) to help keep the photo from being too dark (due to the other two settings).
Everyone has different cameras and skill levels so I’m not even going to attempt to give any kind of camera lesson here.
However, I will share that the settings that have resulted in the highest number of usable photos for me are:
- Focus mode: ASP-C
- Shutter speed of 1/2000 or 1/2500
- Aperture of f4-5.6
- Burst high mode (my camera shoots 11 fps)
Using a tripod for the camera can help it stay more stable but the drawback is that you can’t adjust the position as quickly to move with your dog if needed.
13 Tips for Taking Great Photos of Dogs Catching Treats
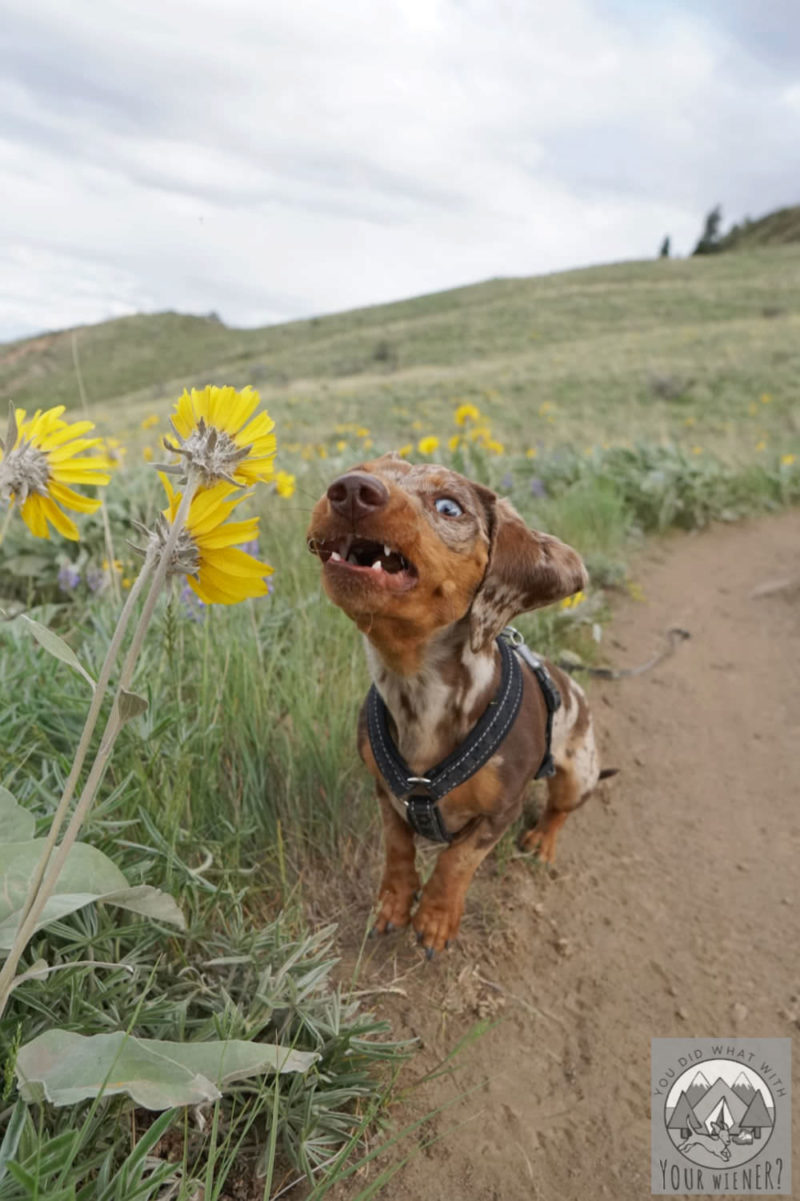
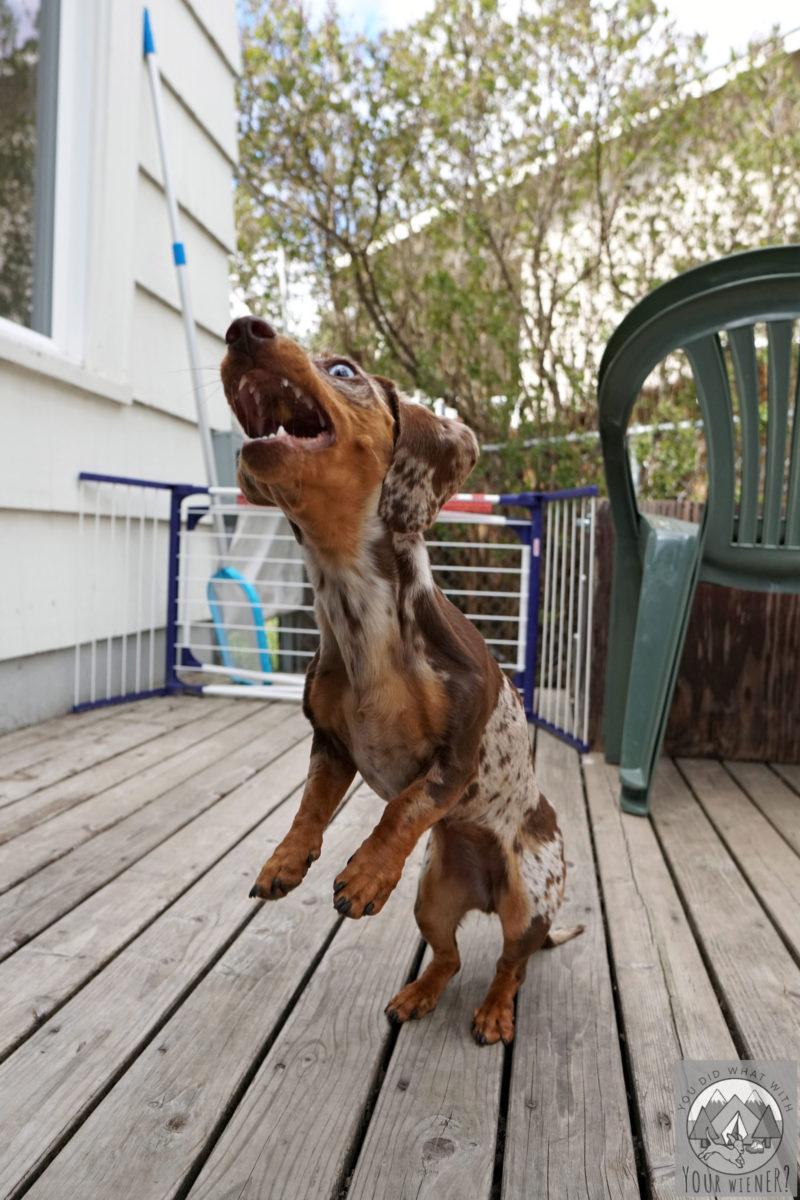
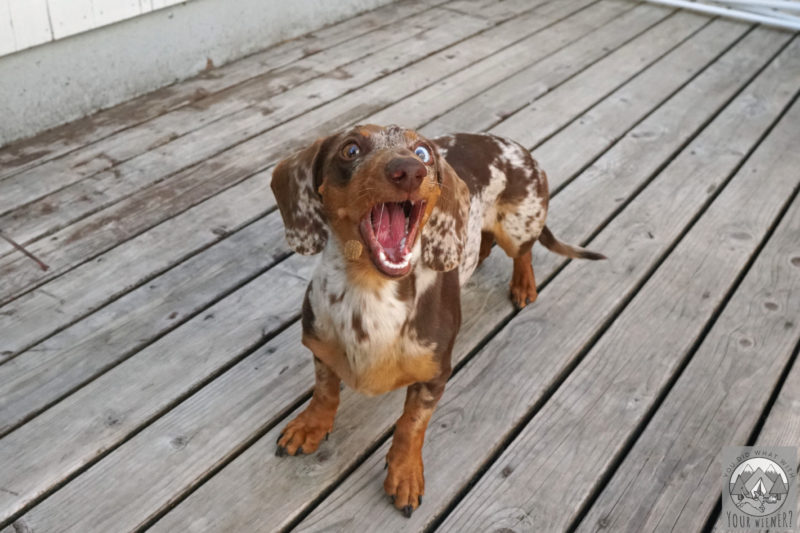
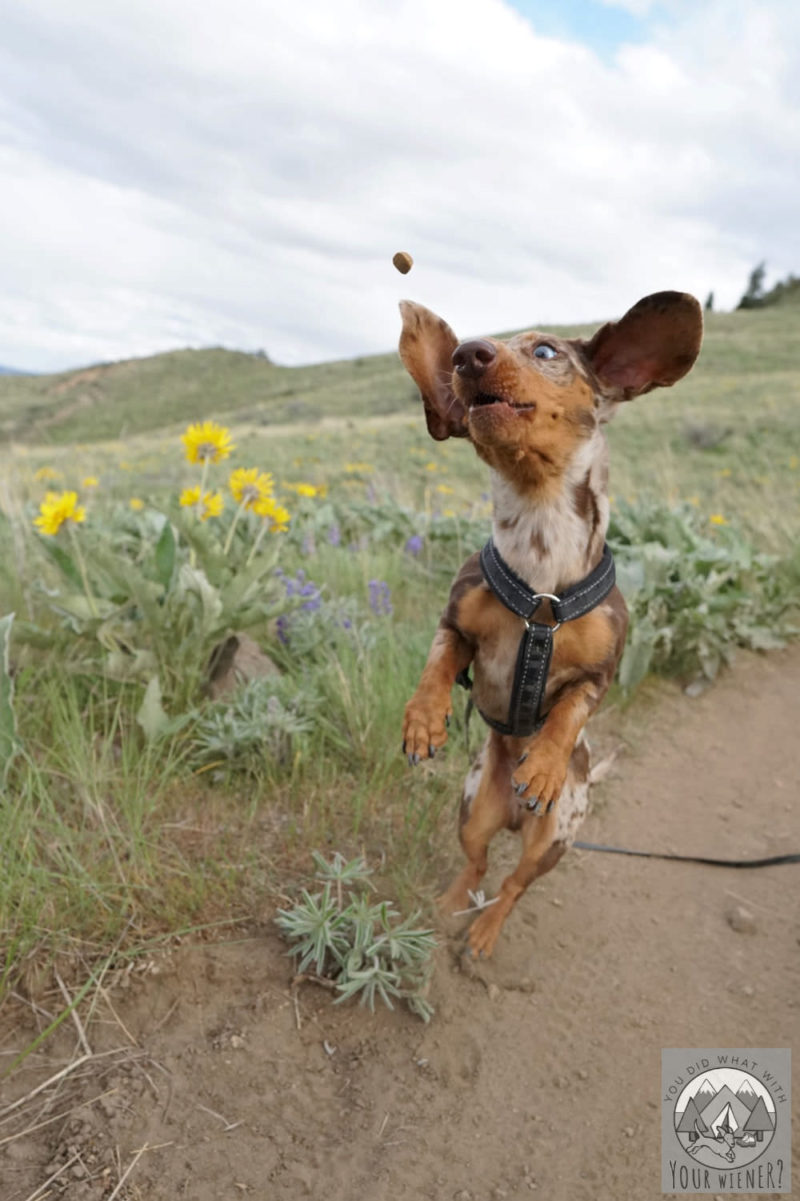
If you want photos of your dog catching treats – you know, the ones you see on the internet where the dogs have a derpy, open-mouth look – learn from my experience with these tips.
- If you and your dog are new to this, start on a hard, flat surface.
- Have your dog sit, or at least stay in one spot, before tossing the treat.
- Practice with several different kinds of treats first to see which ones have the highest degree of accuracy for you(throwing) and your dog (catching most often).
- If you need to use your non-dominant hand to toss the treat when taking pictures, practice throwing with that hand first.
- The natural light outdoors is better than indoor lighting.
- Experiment with flash. Generally, you shouldn’t use flash when photographing your dog. However, if the outside light is bright enough, the flash won’t seem to harsh and may add just the right amount of extra oomph to the photo.
- Place your dog in the full sun or shade when taking the photo. The brighter the light, the easier it is to freeze motion but harsh, uneven light doesn’t produce great results.
- Position dog toward bottom of frame because they will likely jump up and forward when catching so this leaves room in the frame to still capture them.
- Use a portrait orientation for the photo frame (vs. horizontal) to help keep your dog within the frame when they jump up and forward to catch the treat.
- For taking pictures of small dogs, you may need to bend over while taking the picture to get your hand close enough to their mouth.
- If using a DSLR, or if your phone has the capability, take photos in burst mode to capture several quickly in succession.
- If you can take photos on burst, depress the shutter to start taking pictures before you throw the treat.
- Don’t frustrate your self and your dog. Keep photo sessions to 5 minutes or so at a time and stop if your dog misses more than 3 or 4 treats in a row.
Also check out my articles on taking great pics of your dog using a smartphone and taking the perfect photo of your dog for Instagram.
About the Author
Hi, I’m Jessica. I’ve been studying the Dachshund breed since 2007, owned 3 of my own, and shared in the lives of thousands of others through their owner’s stories. When I’m not sharing what I know on this blog, you can find me hiking, camping, and traveling with my adventurous wiener dogs.
Great post. With my smartphone never far away capturing those great moments has become a passion.